Settings for new MacBook Pro
I recently bought a new machine, a MacBook Pro 16", and this is my initial configuration. I’m documenting this for my future self so I have something to cherry-pick from if I will ever configure a new Mac from scratch. Some of these things might not be relevant in future versions of macOS or for future versions of myself, so I don’t see a point in automating it.
Changing machine name
By default my new machine had a very long name, which mostly becomes an issue with my bluetooth headset that speaks out the name of the devices it’s connected to. This setting is under Sharing. I called this machine BigMac.
Trackpad settings
I found two settings that improve the great trackpad on MacBooks.
Enabling tap to click for trackpad
Enabling clicking by tapping on the trackpad rather than having to press it with force is an obvious thing I definitely want to change. Easy to find in System Preferences -> Trackpad -> Point & Click -> Tap to click.
Enabling three finger move of windows
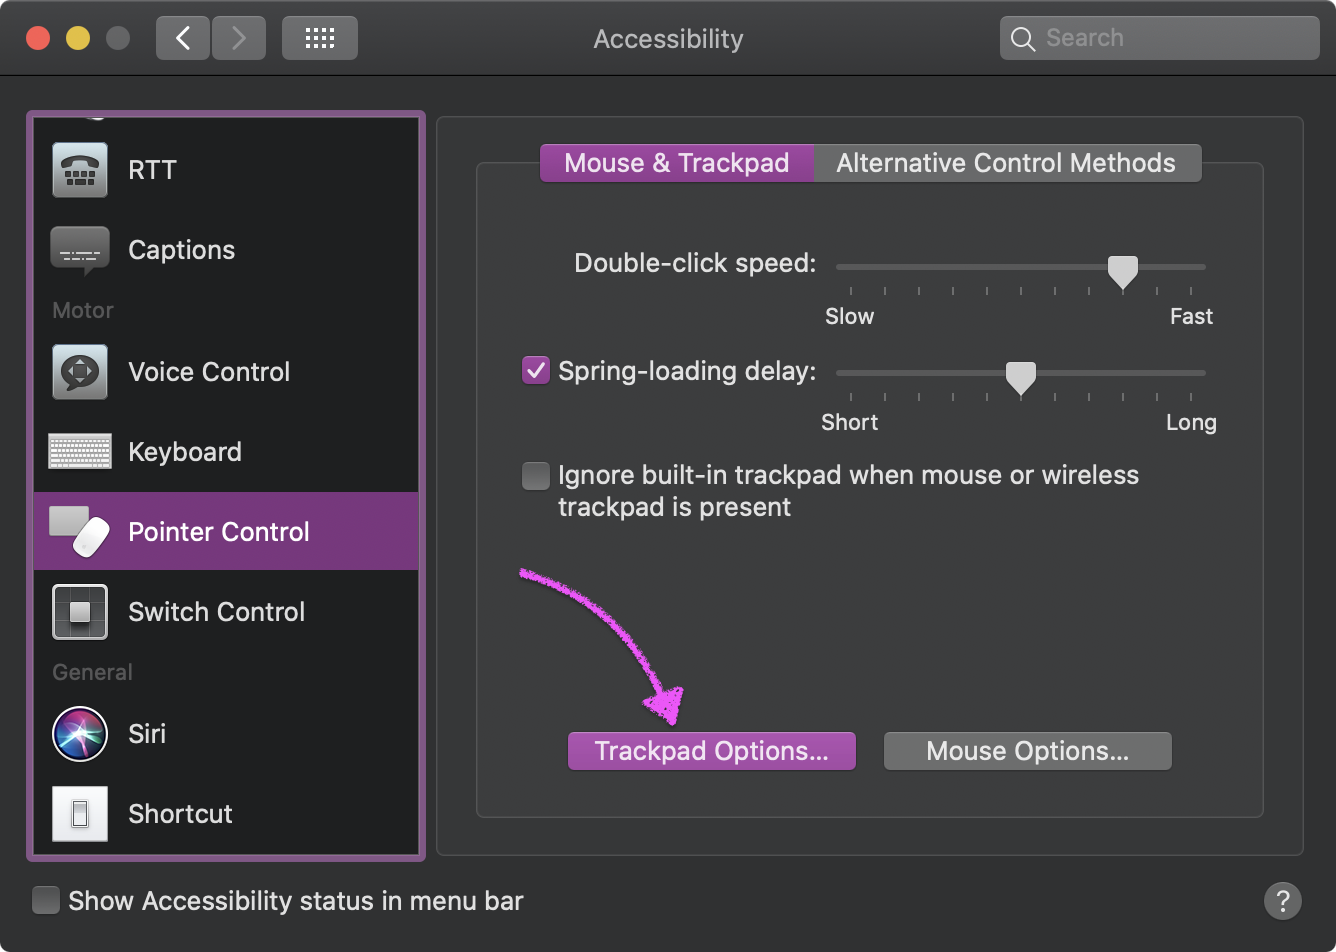
The other trackpad change I make is to enable moving windows with a three finger gesture. I don’t know why this isn’t enabled by default and why it’s buried so deep in the accessibility settings – very inaccessible.
- System Preferences -> Accessibility -> Pointer Control -> Mouse & Trackpad -> Trackpad options… -> Enable dragging -> three finger drag
Installing applications
I prefer to install as much as possible through Homebrew. I copied my old Brewfile to my home directory (~/Brewfile), made some adjustment and ran brew bundle.
I try to keep a fairly updated version of my Brewfile in this gist, but this is the one I used now:
tap "github/gh"
tap "homebrew/bundle"
tap "homebrew/cask"
tap "homebrew/cask-drivers"
tap "homebrew/cask-versions"
tap "homebrew/core"
brew "bash"
brew "bat"
brew "cask"
brew "cowsay"
brew "exa"
brew "ffmpeg"
brew "git"
brew "gource"
brew "htop"
brew "hugo"
brew "node"
brew "nvm"
brew "tldr"
brew "trash"
brew "vcprompt"
brew "wget"
brew "yarn"
brew "youtube-dl"
brew "github/gh/gh"
cask "1password"
cask "1password-cli"
cask "adobe-creative-cloud"
cask "alfred"
cask "baretorrent"
cask "brackets"
cask "firefox"
cask "fork"
cask "inkscape"
cask "iterm2"
cask "kap"
cask "keka"
cask "logitech-options"
cask "menumeters"
cask "microsoft-edge"
cask "mullvadvpn"
cask "onedrive"
cask "overkill"
cask "rectangle"
cask "sensiblesidebuttons"
cask "soundflower"
cask "soundflowerbed"
cask "spotify"
cask "teamviewer"
cask "visual-studio-code"
cask "vlc"
Touch Bar
The Touch Bar is probably my least favourite part of the MacBook Pro, maybe after the very low-quality web cam. I find most of the default configuration to aim for aiding non-tech savvy users with simple tasks. In most web browsers, the Touch Bar shows a big button that sets focus on the address bar.

To me this is a clear indication that it’s made for those who don’t know that ⌘ + L does the same. It is possible to have the Touch Bar always show the Fn-keys, but for now I’ll give it the benefit of the doubt.
Replacing Siri with Screenshot
Since I don’t use Siri, I replaced that button with the one for taking a screen shot. This is done by opening an app that supports the Touch Bar, such as Finder, and then in the menu bar go to View -> Customise Touch Bar. Tapping the part you want to customise on the Touch Bar itself, opens those options.
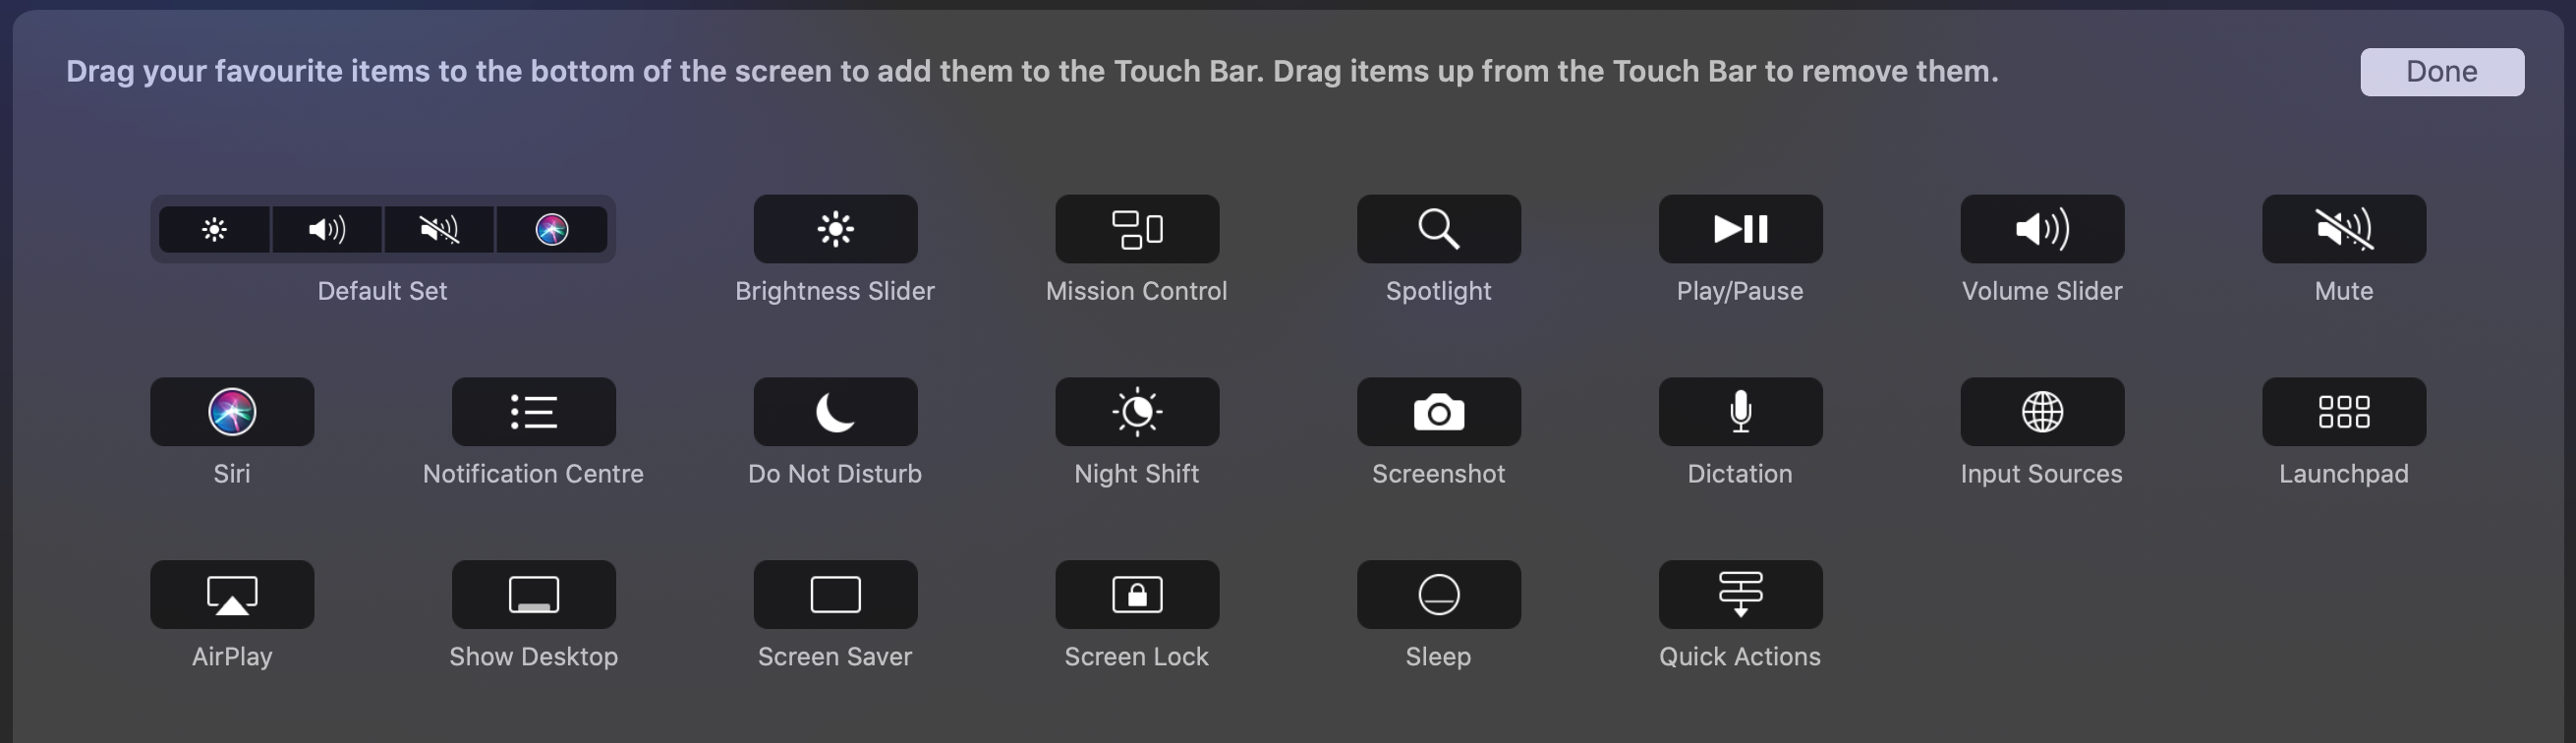
Once I did my first change, this is easy in the way Apple likes to think of their products. My new controls:
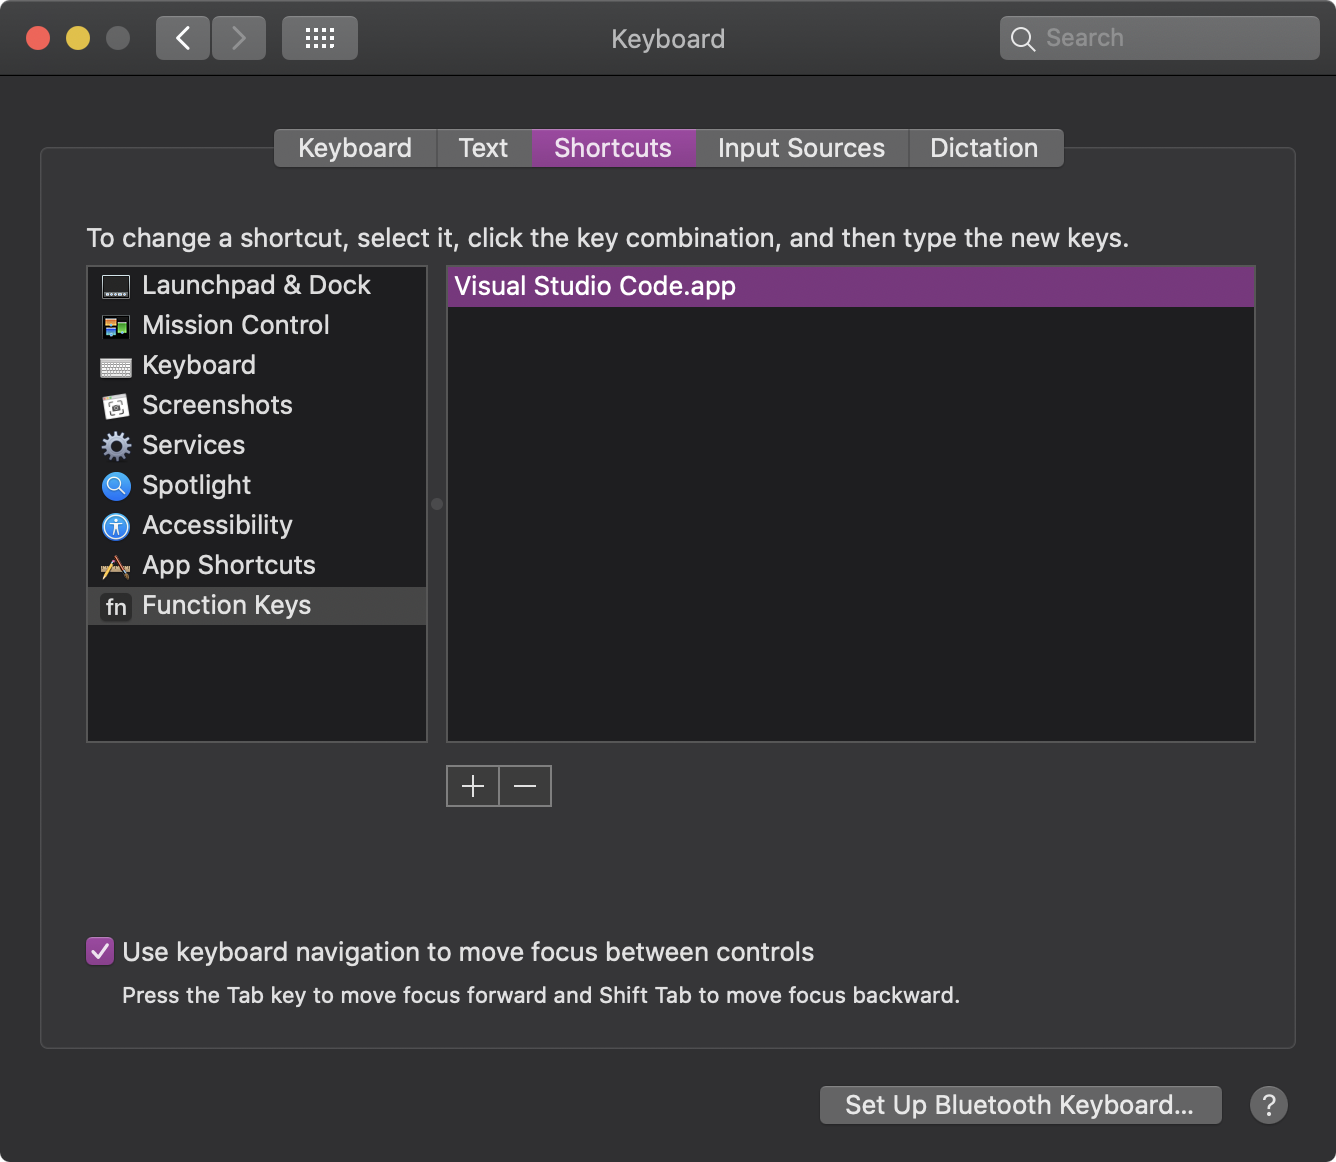
Using function keys in Visual Studio Code
I find the function keys much more useful than anything else in VS Code, so I set an app specific rule for using the function keys, as shown below.
And…look at this! We’ve gone full circle with the Touch Bar in VS Code:
General desktop changes
There are a bunch of smaller changes I’ve done and I don’t remember all of them, but here are a few.
- Show path and status bar in Finder
- Remove the Stocks widget from Notification Centre. I find it astounding that an app for stock exchange rates is pre-installed and impossible to remove.
Sorting in Finder
Default setting for Finder is apparently to show files in no particular order. To fix this to sort by name, that setting can be changed in the dialogue opened by ⌘J. This then only applies to the current folder, so to make it the default, there is a special button for that.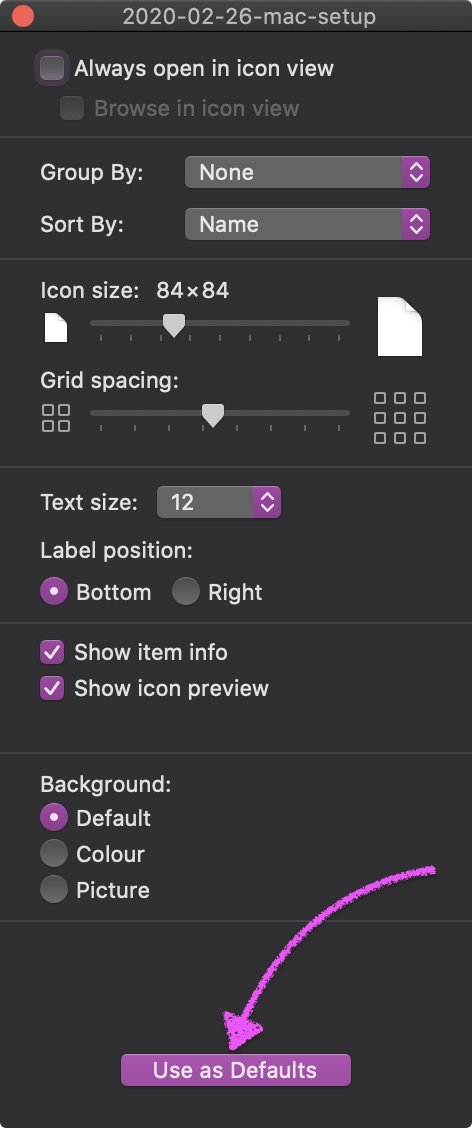
Arrange windows
For a MacBook with a small screen, this might not be that useful, but with a larger display I find it really helpful. It’s basically to enable the possibilities that has been in Windows for many years, like putting two windows next to each other. There are a number of applications that does this. I use Rectangle because it’s free and open source. Though it is possible to align windows next to each other out-of-the-box as well, that involves precision clicking on the green maximise button, so it doesn’t count.
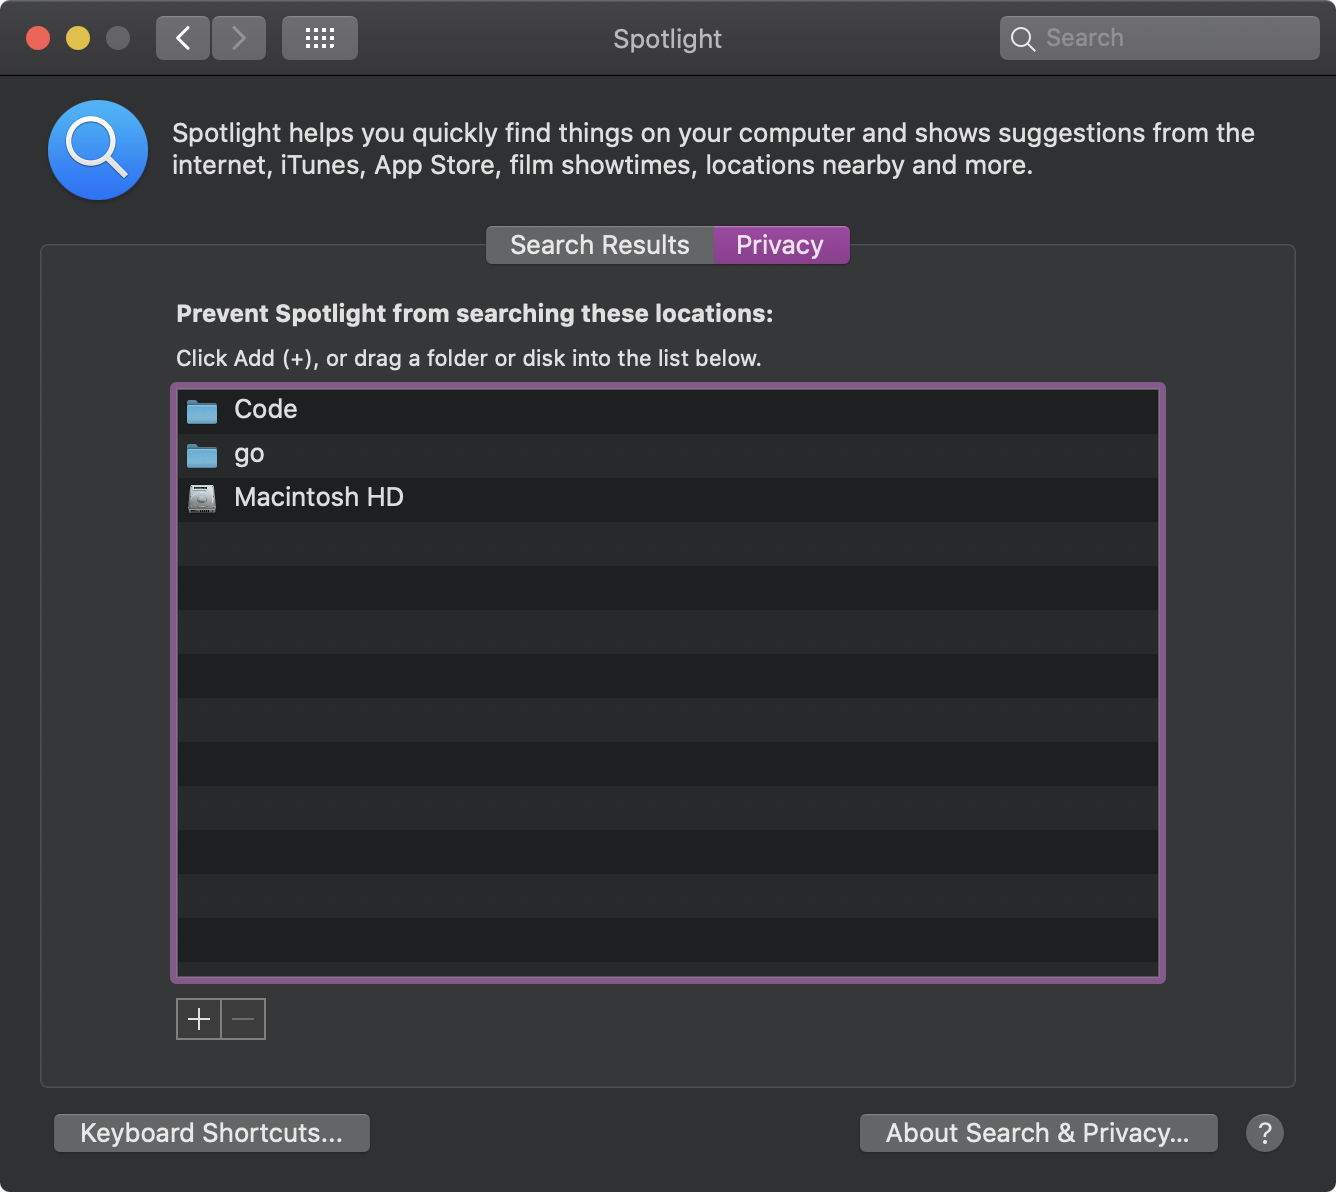
Removing irrelevant search results
I use Alfred for searching apps and files, but to remove irrelevant files from the results, you have to go into the Spotlight settings, under the Privacy tab. I have these paths removed:
- ~/Code (which is where I clone all repos and where node_modules end up)
- ~/go (where Go stuff ends up)
- /System/Volumes/Data (nothing I’m looking for is here)
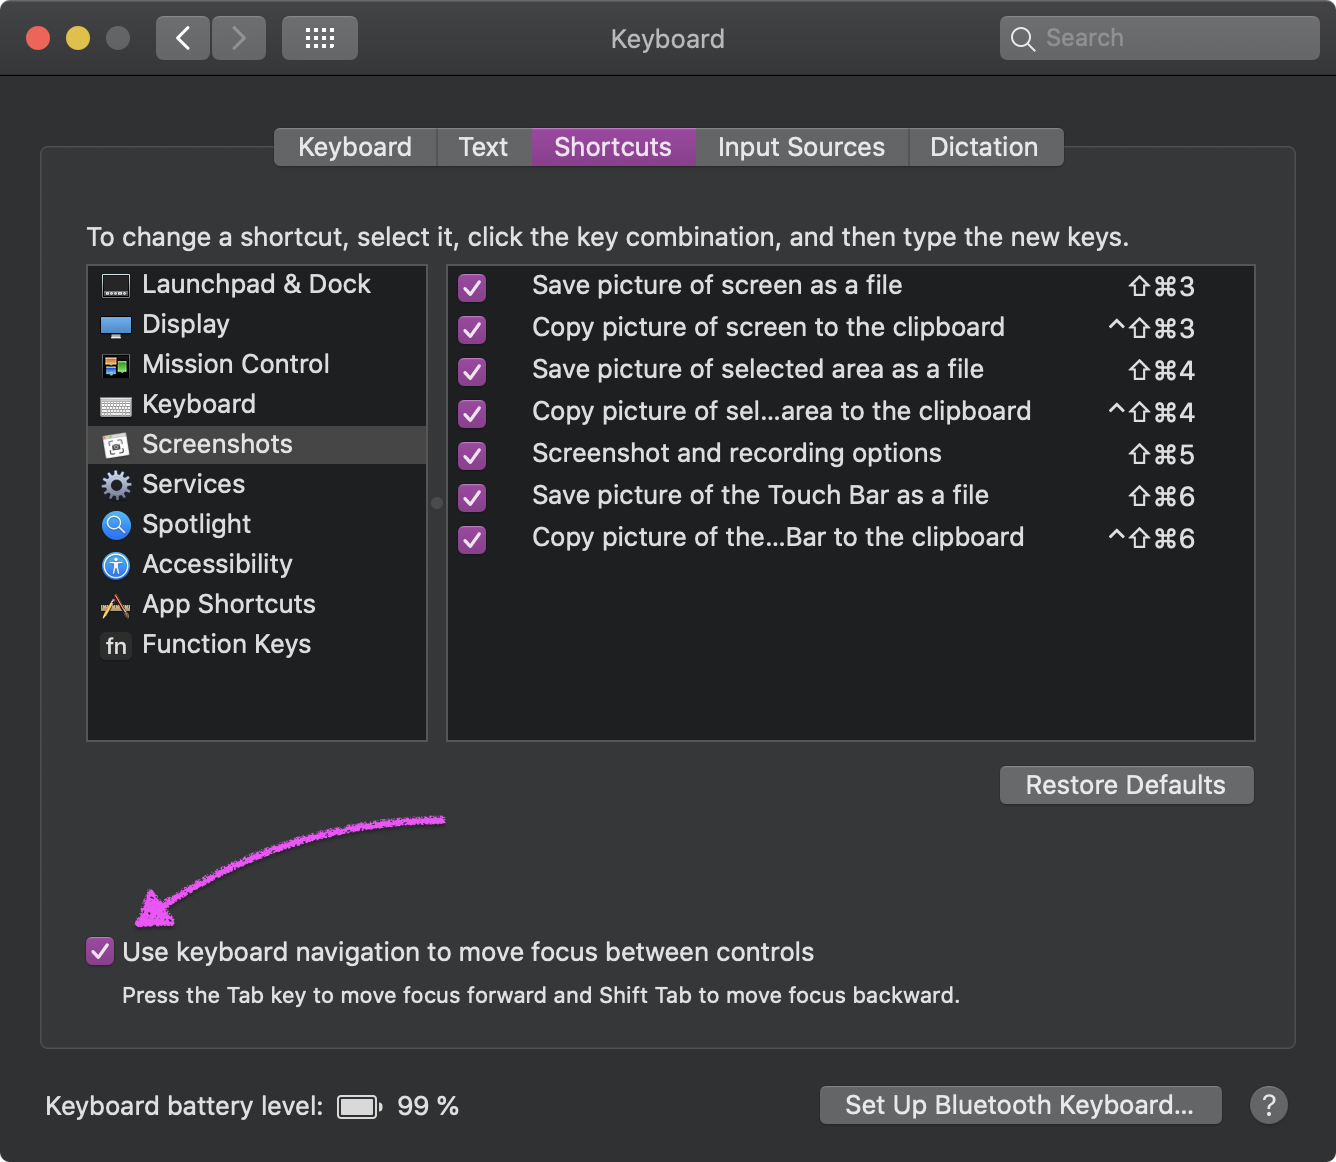
Keyboard navigation
To be able to use the keyboard in dialogue windows and such, you need to enable a setting because…I wish I knew.
System Preferences -> Keyboard -> Shortcuts -> Use keyboard navigation to move focus between controls.
Allow keyboard focus on links in Firefox
Using Firefox, there is an extra setting you have to do to be able to use keyboard navigation (moving focus to links).
In addition to the All controls setting in macOS described above, you also have to type about:config in Firefox and create a setting with the key accessibility.tabfocus and set it to true, see Stack Overflow question.
Adding key bindings for external keyboard
I have the full size keyboard with numerical pad from Apple. What I found was that the keys that are called Home and End on other keyboards (not from Apple), don’t do what I expect in a text file (moving the cursor to beginning or end of line).
To fix this I created the file ~/Library/KeyBindings/DefaultKeyBinding.dict with the following content:
{
  "\UF729"  = moveToBeginningOfLine:;
  "\UF72B"  = moveToEndOfLine:;
  "$\UF729" = moveToBeginningOfLineAndModifySelection:;
  "$\UF72B" = moveToEndOfLineAndModifySelection:;
  "^@\UF701" = "noop:";
  "^@\UF702" = "noop:";
  "^@\UF703" = "noop:";
}
Each app needs a restart to make it take effect, see Stack Exchange. The “noop” settings prevents the system from beeping when pressing ⌘⌃↓.
Toggling integrated terminal focus in Visual Studio Code
A thing I have found useful is to be able to toggle focus between the editor and the integrated terminal in VS Code with the keyboard. There is currently no built-in shortcut for this, so I have added one. This is for my keyboard (a Swedish one), but I think that’s okay since most other shortcut descriptions on the web assumes an English keyboard. Showing and hiding the terminal is ⌘J, btw.
Keyboard shortcuts are accessed from Code -> Preferences -> Keyboard Shortcuts [⌘K ⌘S]. The commands are called Terminal: Focus Terminal and View: Focus Active Editor Group. I use the lovely shortcut ⌘Ö for both of them (toggling) and the conditions are !terminalFocus and terminalFocus respectively.

The resulting configuration in keybindings.json:
{
  "key": "cmd+[Semicolon]",
  "command": "workbench.action.terminal.focus",
  "when": "!terminalFocus"
},
{
  "key": "cmd+[Semicolon]",
  "command": "workbench.action.focusActiveEditorGroup",
  "when": "terminalFocus"
},
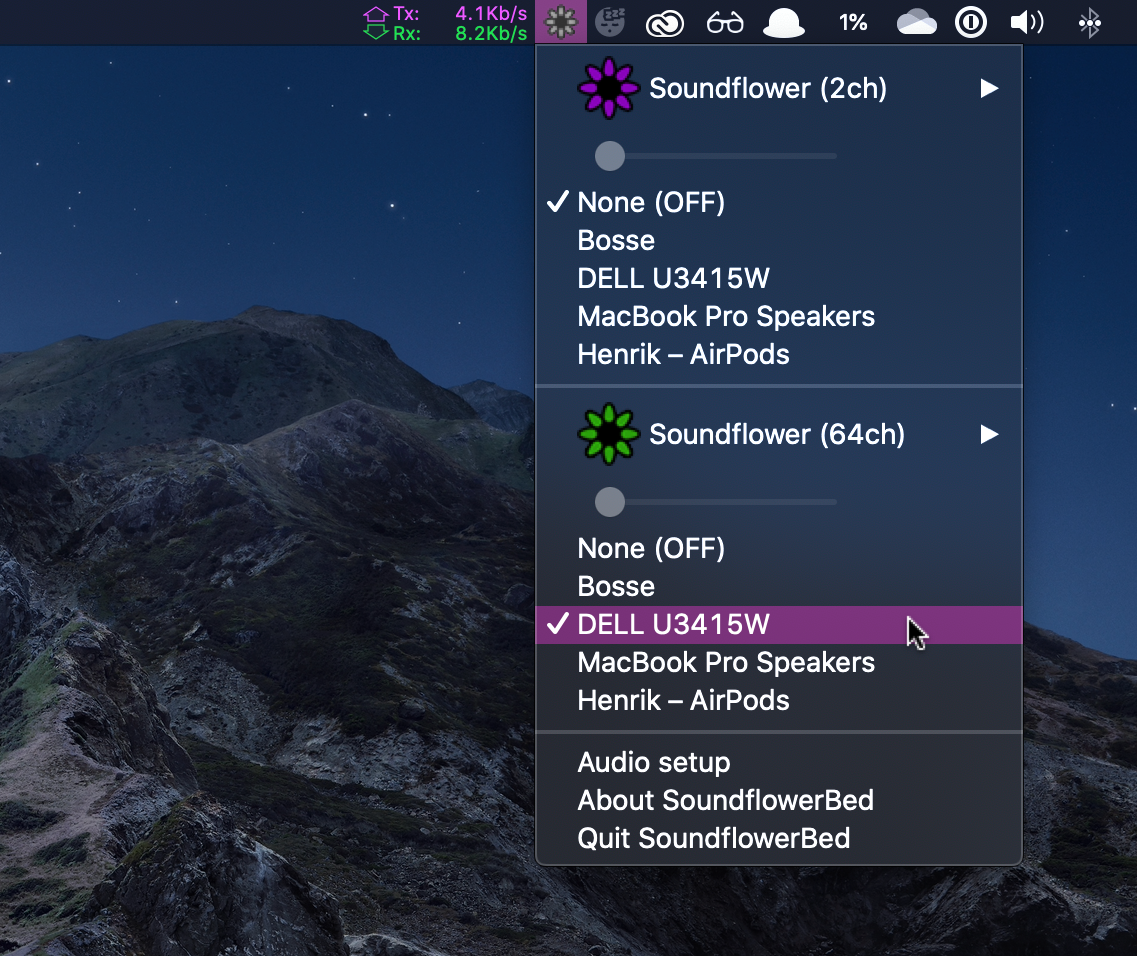
Controlling sound volume on external display
I have an external Dell display that connects through HDMI. At first, all sound output through the display was at max volume. To adjust the volume, I had to dive into the fiddly settings on the display itself. By installing Soundflower and SoundflowerBed, I can now control the volume with the built-in controls of macOS.
That’s it, at least for now!